
|
This modification is for 280mm square Fiamma© vent with fan. These originally come with the switch wired to either vent out or blow in both at high speed that is loud enough to annoy the neighbours. I couldn't think of one good reason to have a vent fan in a toilet or shower that would blow on you and so I decided to modify it so that it would vent either at high speed or reduced speed. It is so quiet running at reduced speed ( and draws much less current) that it is possible to leave it running all day if necessary without annoying anyone. The second part of this page deals with a modification to alert you that the vent lid is up. I have left ours open a number of times at night only to find that it has rained in thru the open lid. This secondary modification will show a flashing red LED as long as the lid is up. It only draws about 10mA average current so will not flatten your house batteries even if left open continuously. If your fan motor is a little worn it may occasionally not start when set to slow but a quick flick to fast and back to slow will loosen it up.
|
 |
 |
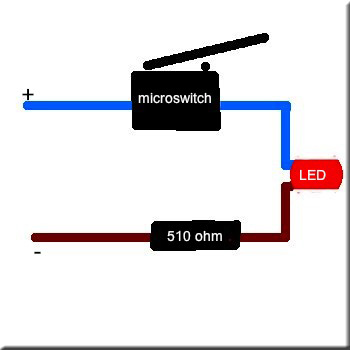 |
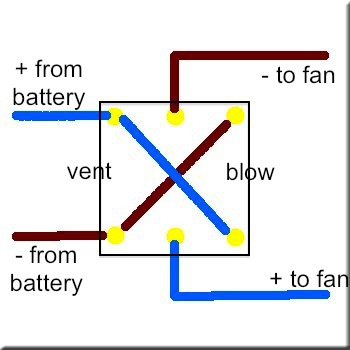
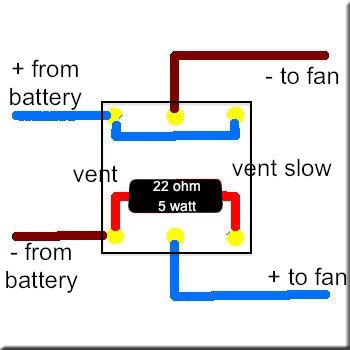
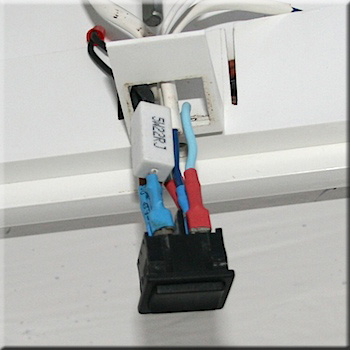
| This shows how the fan switch was wired originally. The wire colours would not have been my choice but this was how it was wired by Fiamma©. | This shows the switch with the crossover removed and a 22 ohm 5 watt resistor added into one of the links. (Jaycar© RR-3258) | This is the secondary modification showing the microswitch, flashing red LED and the series 510 ohm half watt resistor. Just connect this to the incoming 12v supply on the vent fan switch. (Jaycar© SM-1039,ZD-0240,RR-0565) |
 |
 |
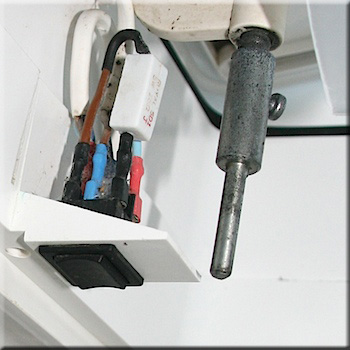 |
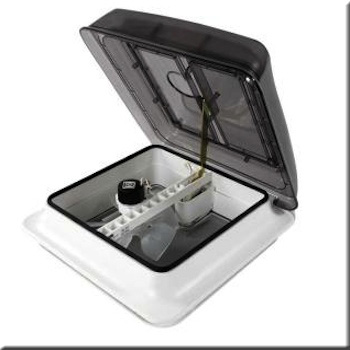
| This illustrates the type of Fiamma vent that this refers to, but it will also work on the larger ones with the same switch. | This shows the switch wired up complete with the speed reducing resistor. | The switch returned to its correct place after modification, make sure you keep the resistor away from the other wiring as it will get hot. Check the operation now to make sure the fan is working correctly. If it is blowing in on both settings reverse the wires to the motor on the switch. If its all OK and you are not doing the secondary modification you can refit the covers and enjoy your new quiet exhaust fan. |
 |
 |
 |
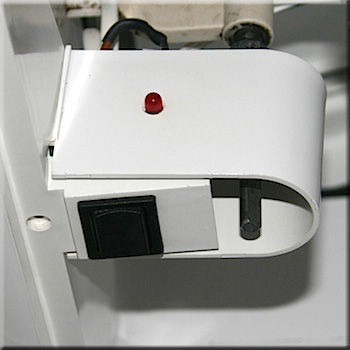
| Mount the microswitch on the plastic crosspiece with a couple of small gauge stainless steel self tappers. You need a really short screwdriver to do this but once it has started to screw in it is fairly easy. The wires should be connected to the outer two terminals so as to make a circuit when the vent cover is opened. Check to see if the switch operates as soon as you open the hatch (you will hear it click), if not bend the metal arm up slightly to adjust. Feed the wire along the plastic strip and secure with a couple of cable ties to keep it out of harms way. | The finished position for the LED in the switch cover through a hole that is a tight fit to hold it there. A word of caution, switch off the 12v to the vent whilst doing this these modifications to prevent accidental short circuits. Cover all connections with heatshrink tubing to protect them. | What it looks like from inside when the hatch is open. LED is flashing of course :) |
Send E-mail to
This information is for private use only and should not be misrepresented as your work or directly linked without the owners permission.