LED Tubelights Fitted to the ceiling |
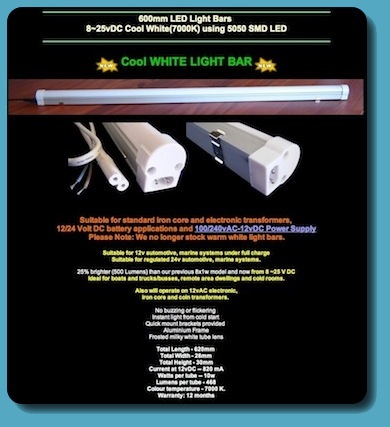
Listing from Ledshop Online |
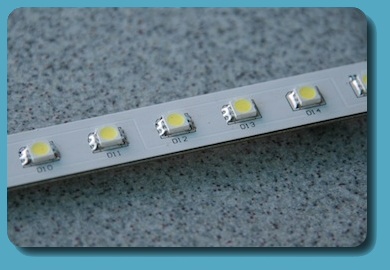
Type 5050 triple junction LEDs |
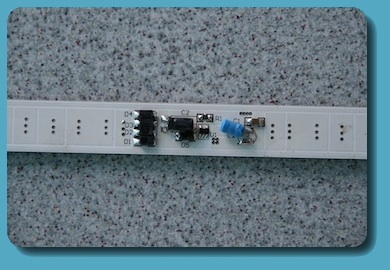
Current Regulator |
|
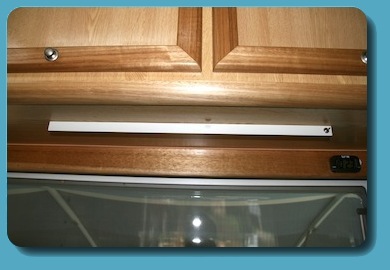
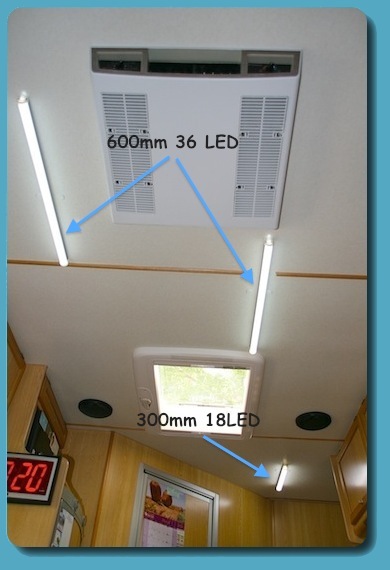
After 12 months of constant use with the original LED conversion using the 60 LED strips there have been a couple of problems that have surfaced. Firstly the initial batch of the strips were not up to standard and I suffered a number of failures, secondly I have noted that there is becoming significant heat distortion of the back of the most used fittings because the LEDs are stuck straight to it. To overcome the latter I had decided that it would be better if the LEDs were attached to a piece of aluminium spaced from the plastic case. Luckily there has been some new LED strips produced now and I decided that as well as fitting the aluminium I would change the type of led strip fitted. Unfortunately this was a complete failure as these LED strips are extremely intolerant of heat and when fitted to an enclosure like these only lasted a couple of weeks. Following this I decided to discard the original enclosures and replaced them with 600mm LED bars from www.ledshoponline.com. These as you see are made using 36 x 5050 triple junction LEDs fed from two current regulators one for each 18 LEDs. The far one in the picture over the entry was replaced with a 300mm 18 LED version as there was not so much need there. These LED bars are covered by a 12 months warranty so I figured that the high cost of $70 each was a good investment as the DIY versions when used full time are not reliable enough. They are also good to run from 8-25vdc so they are bullet proof with charging voltages. They come with mounting clips and a plug in power lead. I preferred to modify the fitting so I could screw through the aluminium channel case and take the 12v lead out through the back straight into the roof but it can be mounted as easily as two spring clips and attaching the 12v wires. There are no switches fitted but I fitted one to the 300mm one as we don't often need that one on.
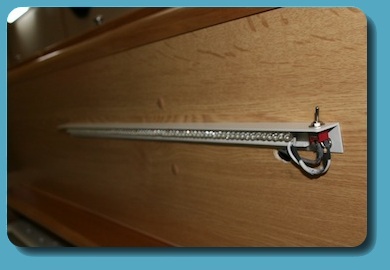
I had a remaining brand new 75 LED strip so I used it to provide a downlight over the sink area by gluing it to a length of 20x20mm aluminium and fitted with a switch. This seems to prove the heat theory as this strip out in the open has shown no sign of self distruction. This strip is discrete hi output LEDs fitted to a rigid PC board strip slotted into a plastic carrier. They come in a 600mm length of 75 LEDs in the usual groups of 3 LEDs and a 180 ohm resistor each and are easily cut to the correct length if necessary. The LED strip was then glued to the aluminium using the two part 302 acrylate glue also from Deal Extreme before the whole assembly was attached to the overhead cupboard with a couple of self tappers. These strips unfortunately have not been designed to operate at normal charging voltages and to protect the LEDs I added a series 3 ohm 1/2 watt resistor to maintain the maximum current to each LED string to less than 25mA with a supply voltage of 14.7V. |
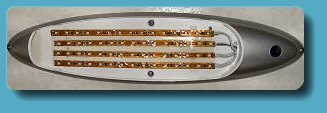
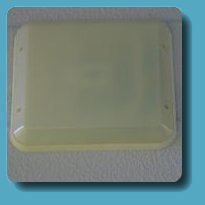
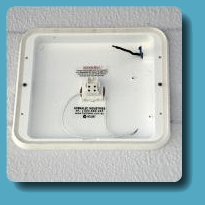
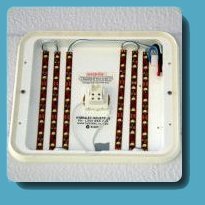
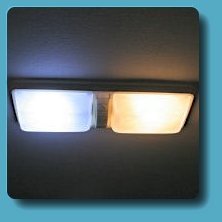
LED Strips Installed in Fluoro Fitting |
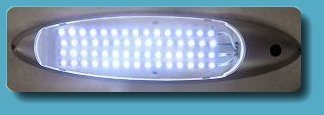
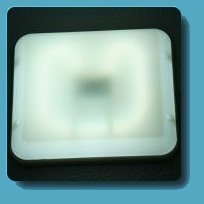
LED Strips Installed and Illuminated |
LED Strips With Defuser |
|
These fluorescent light fittings contained 2 x 8w fluorescent lamps and the electronics to run them. The tubes were removed along with the electronics and leaving just the switch. Four strips of double sided adhesive tape were stuck to the base where the tubes had been then cut 15 LED strips were secured after the wires had been soldered to the connection pads. The wires were routed into the switch section and then connected to the 12v wiring with a 2 pin connector. The LED strips SKU5312 were purchased from Deal Extreme on the internet. Cost is US$18.55 delivered. They come in 66LED lengths and may be cut in groups of 3 leds. There was insufficient room to fit the full 66 LEDS so from the strip there are 6 LEDs left over for another project. Be sure to use good quality 3M© double sided adhesive so there is no chance of the LEDs becoming loose. The whole job takes around 15-20 minutes and reduces the consumption of the fitting from 16 watts to a mere 4.8 watts with very similar light output but a brighter white colour. Click here for diagram how to wire up these strips to run 24V |
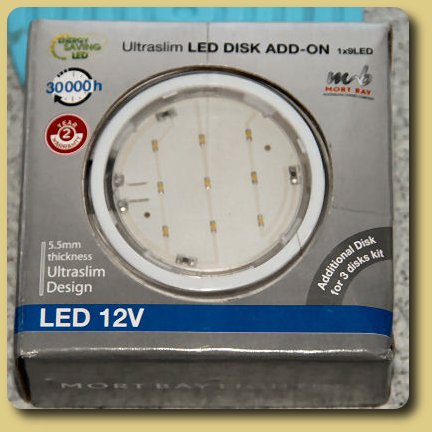
Package Containing One LED Lamp (click for larger image) |
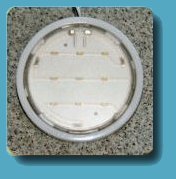
LED Lamp Removed from Package |
Showing Underside |
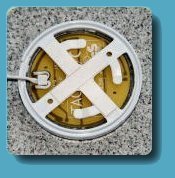
Plastic Mount Removed (click for larger image with cover removed) |

Fitted to Rangehood |
Illuminated |
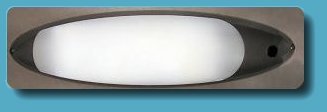
| To replace the 2 x 10W halogens in the Dometic rangehood I chose these ready made LED lamps that I found in Bunnings for $13 each. It proved almost impossible and expensive to get MR11 LED lamps and finding these was good luck. They are intended to suppliment a kit of 3 with power transformer but all we needed to buy was two of the suplimentry lamps. As shown they are fitted to a removable plastic mount that can be attached to any serface with the double sided mounting tape supplied or two small screws. I chose to fit them inside the metal plate where the MR11's were mounted so removed them from the plastic mount with a twisting action first then carefully aligned them over the holes in the metalwork and secured with four drops of adhesive. They were held in place with tape long enough for the glue to dry before discarding it. The wires supplied are cut to about 250mm length and then connected to the lamp supply terminal strip in the rangehood. There was no need to remove the original MR11 sockets as they don't interfere with the new lamps. The new LED lamps are fitted with 9 surface mounted LEDs in 3 strings of 3 each with a series 200 ohm resistor so there should be no problem with higher charging volts. They have a pleasant warm colour that is probably best for over the cooking area. They claim to produce as much light as a 5 watt incandescant and I am inclined to agree. They are not as bright as the halogens but are more than adequate for the stovetop. This is a massive power saving replacing 20 watts of halogen lamps with just 1 watt of leds. |
Original Light Fitting |
Original Halogen Bulb |
Fitting Disassembled Ready for Upgrade |
Ready for Assembly |
Illuminated |
| For the three bedroom downlights I again chose the Bunnings ready made LEDs this time using only the PC board and discarding the rest. The wires cut to about 100mm length and then soldered to the existing wiring and the joints covered with heatshrink. The one problem encountered was that the PC boards were a tiny bit larger than the plastic housing so the plastic had to be carefully scraped away to allow them to fit snugly. These halogens were 5W each and now 15W of lamps is replaced with just 1.5W of LEDs another winner. Bonus is that the lights are now softer in the bedroom area rather than the harsh halogen glow. |
Original Light Fitting |
12 LED block fitted and 21W automotive globe removed |
Closeup showing 16 ohm series resistor in black heatshrink |
Power on |
Defuser fitted |
| This light fitting in our shower contained of all things a 21W automotive globe and has been replaced with a 12 LED block held in place with a generous blob of silicon and fitted with a 16 ohm 1/2 watt series resistor (in the black heatshrink) to protect it from high charging voltages. The connecting wires were soldered directly to the incoming wires and fed in thru the original lamp holder. The 12 LED block SKU3513 were purchased from Deal Extreme on the internet. Cost is US$6.50 delivered. Huge power saving here replacing 21 watt with 1 watt of LED light that is significantly brighter ! |
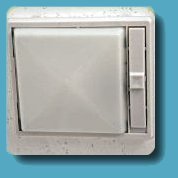
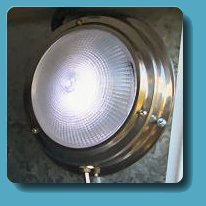
Original Light Fitting |
Original Light Fitting with Lamp Illuminated |

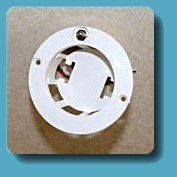
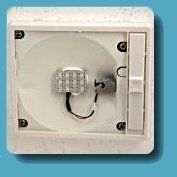
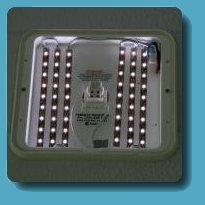
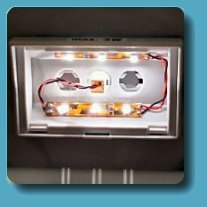
Defuser Removed Showing Old Internals |
Bare Fitting ready for LEDs |
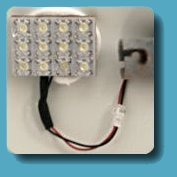
LED Strips Fitted |
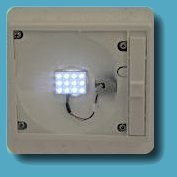
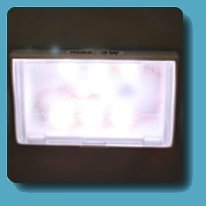
Powered Up |
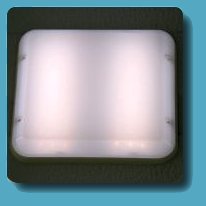
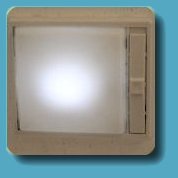
Defuser Replaced and Illuminated |
| Two of these fluorescent light fittings were located under our awning. They each contained a single folded 22w fluorescent lamp and the electronics to run them. The tubes were removed along with the electronics just leaving the lamp socket as it was glued in. Six strips of 9 leds were stuck down using the 3M© adhesive provided with these new strips. Wires had been soldered to the connection pads and the six strips were wired up as two separate groups for simplicity. The wires connected directly to the existing wiring and soldered and heat shrinked as these fittings can't really be removed. The LED strips SKU5312 were purchased from Deal Extreme on the internet. Cost is US$18.55 delivered. They now come in 60 LED lengths and may be cut in groups of 3 LEDs but they are significantly better made then the earlier ones. There was insufficient room to fit the full 60 LEDS so from the strip there are 6 LEDs left over for another project. The whole job took less time than the interior fluoro's each taking around 10-15 minutes and reduces the consumption of the fitting from 22 watts to a mere 4.3 watts with almost the same light output but the difference could be the less harsh colour than the original. |
Original Light Fitting |

12 LED block fitted and 21W automotive globe removed |
16 ohm series resistor in black heatshrink and power on |
Defuser Fitted and Illuminated |
| This light fitting in the locker has the same 21W automotive globe as the shower fitting above and has been replaced with a 12 LED block held in place with a generous blob of silicon and fitted with a 16 ohm 1/2 watt series resistor (in the black heatshrink) to protect it from high charging voltages. The connecting wires were soldered directly to the incoming wires and in this fitting the lamp holder could be removed so the wires are fed in thru the hole where is was. The 12 LED block SKU3513 were purchased from Deal Extreme on the internet. Cost is US$6.50 delivered. Another huge power saving here replacing 21 watt with 1 watt of LED light that is again significantly brighter ! |
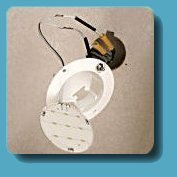
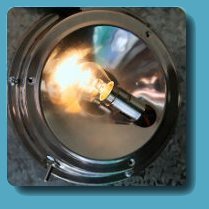
Original Light Fitting |
Dometic Globe |
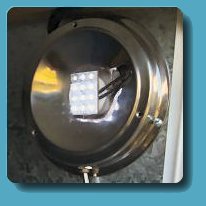
Dometic Globe Base Connected to LED Strips |
Leds Fitted and Illuminated |
Defuser Fitted and Illuminated |
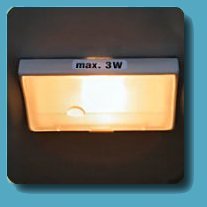
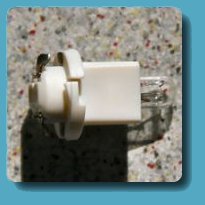
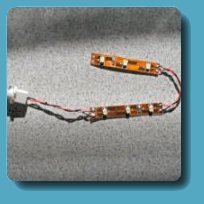
| There was no real gain in doing this modification but as it was the last conventional globe it was begging to get replaced. As you can see it is a specialist Dometic lamp and after removing the glass envelope from the base I was able to connect wires to the base and to the two strips of LEDs. These were left over from the awning light mods done earlier so no cost. The label on the fitting says 3W maximum so can only guess as there was just one globe fitted that it may be a 1Watt lamp and now replaced with bright white approx 0.5Watts LEDs. |
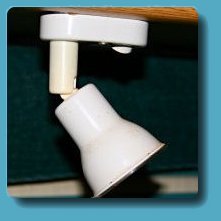
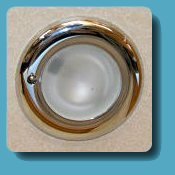
Original Light Fitting |
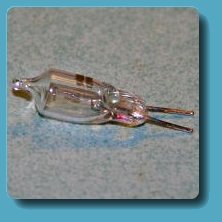
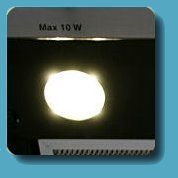
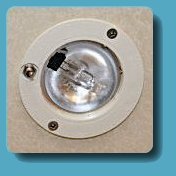
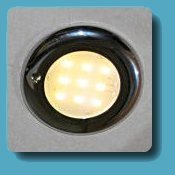
Wasteful 10W G4 globe that was removed |
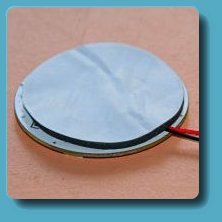
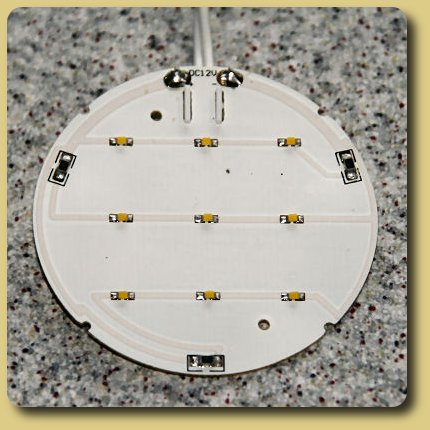
12 LED module as supplied with adhesive tape on the back, these modules have 12 LEDs but each has 3 emitters so equivalent to 36 single LEDs |
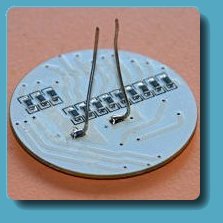
Tape removed and two stiff wires replace the original connecting wires, 12x 150ohm resistors are fitted to the back making this module safe with charging voltage |
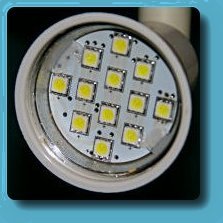
Module is carefully fitted making sure the new wires go into the original socket correctly, check lamp operation here as polarity may be reversed. Then secure with 2 small blobs of silicon |
Lamp Illuminated |
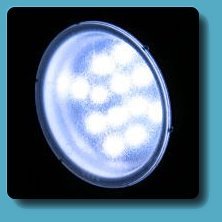
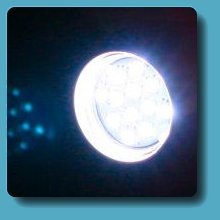
Defuser refitted, these LED modules are approx 3W compared to original 10W but the light output is significantly better |
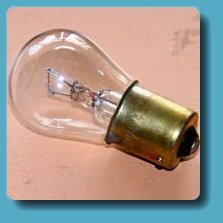
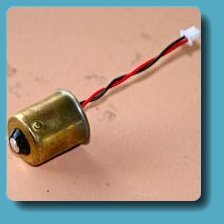
21w Auto lamp removed for modification |
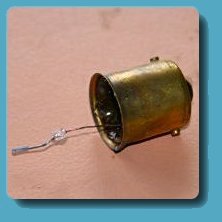
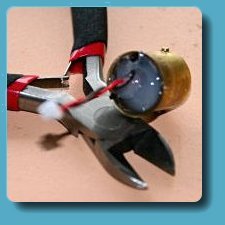
Carefully break the bulb and remove the glass with pliers. CAUTION! WEAR EYE & HAND PROTECTION |
The base with wire ready to solder, red to the center connection black to the side |
Wires fitted |
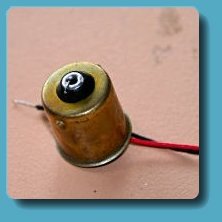
Fill the lamp base with silicon to support the wiring |
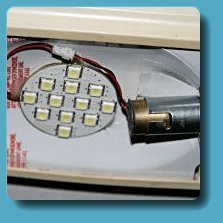
Module is attached with blob of silicon to metal base and the plugs attached |
Longer view showing the other side of the dual globe fitting |
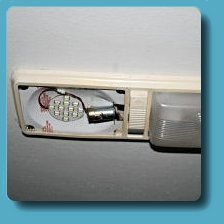
The finished job powered up showing the difference in light output to the unmodified side, huge power savings with this replacement. |